The newest wearables for 2023 will help you stay connected and in shape. Given the variety of options available, selecting the best one might be difficult.
We’ll highlight the best smartwatches in this guide that incorporate cutting-edge technology for a range of lifestyles. Come along as we examine the top smartwatches of 2023, suitable for both fitness lovers and tech-savvy people.
The Best Smartwatches of 2023: Top Picks for Health, Fitness, and Connectivity
By 2023, smartwatches will be a necessary piece of equipment for anyone who values connectivity and good health.
This post will review the best 15 smartwatches of 2023 (December Update), which include state-of-the-art hardware, connectivity, and health features.
1. Apple Watch Series 9 [GPS 45mm]

Introducing the Apple Watch Series 9, the perfect partner for leading a healthier lifestyle. Its cutting-edge touch-free interaction technology and beautiful display, driven by the S9 chip, make navigation a breeze.
With cutting-edge features like blood oxygen monitoring, ECG readings, sleep tracking, and emotional well-being analysis, you can uncover profound health insights. It is your fitness ally, providing you with a variety of exercise options and three months of Apple Fitness+ for in-depth instruction.
Fall and Crash Detection prioritizes safety by guaranteeing immediate emergency aid. It streamlines operations, such as using Apple Pay and unlocking your Mac, and is seamlessly linked with Apple devices.
Enjoy infinite personalization by choosing from a variety of bands and faces that may be customized to fit your mood or style. With the Apple Watch Series 9’s unparalleled capabilities, elevate your lifestyle.
SPECIFICATIONS
| Brand | Apple |
| Model Name | Apple Watch Series 9 |
| Style | M/L – fits 160–210mm wrists |
| Color | Silver Aluminum Case with Storm Blue Sport Band |
| Screen Size | 45 Millimeters |
| Special Feature | Cycle Tracking, Activity Tracker, GPS, Voice Control, Heart Rate Monitor |
| Shape | Rectangular |
| Target Audience | Unisex Adults |
TODAY’S BEST DEALS
REASONS TO BUY
+ Larger screen area for a better viewing experience
+ Improved performance with the faster Apple S7 SiP
+ Have blood oxygen sensor, heart rate monitor, and ECG
+ Water resistance for swimming and other water activities
+ Interchangeable bands for customization
+ Comprehensive connectivity options, including Bluetooth, Wi-Fi, and cellular
REASON TO AVOID
– Higher price point than other smartwatch options
– Limited battery life (up to 18 hours with typical use)
– Compatibility limited to iPhones only
2. Samsung Galaxy Watch 4

In terms of appearance and health monitoring, the Samsung Galaxy Watch 4 is outstanding. Fitness enthusiasts can utilize its sophisticated capabilities, which include GPS tracking, heart rate monitoring, and sleep tracking.
Apart from its fashionable design, the watch has comprehensive health monitoring capabilities, including options for monitoring blood pressure, heart rate, and ECG. Its several training modes accommodate a variety of exercises, and its embedded GPS tracks outdoor workouts in real time.
Because of its longer battery life and cellular connectivity for calls and messages. The Galaxy Watch 4 is without a doubt the greatest choice out there because to its perfect mix of fitness tracking, connectivity, and fashionable design. It is predicted to dominate the smartwatch market in 2023.
TODAY’S BEST DEALS
REASONS TO BUY
Design: The Samsung Galaxy Watch 4 has a sleek and stylish design that is both elegant and functional, making it a great accessory for any outfit.
Performance: The device is powered by a powerful Exynos W920 processor and runs on the latest version of Wear OS, providing a smooth and intuitive user experience.
Health and Fitness Features: The Samsung Galaxy Watch 4 comes loaded with advanced health and fitness features, including heart rate monitoring, blood oxygen level tracking, and sleep tracking, making it a great choice for anyone looking to improve their overall health and wellness.
Connectivity: The watch offers seamless connectivity with your smartphone, allowing you to receive notifications, make and receive calls, and control your music and other smart home devices right from your wrist.
Battery Life: The Samsung Galaxy Watch 4 has a long-lasting battery life that can last up to 40 hours on a single charge, making it a reliable and convenient device for everyday use.
REASON TO AVOID
Price: The Samsung Galaxy Watch 4 is a premium smartwatch that comes with a high price tag, which may be a barrier for some buyers.
Compatibility: The device is designed to work best with Samsung smartphones, so if you own a different brand of phone, you may experience some compatibility issues.
3. Garmin Venu 2

TODAY’S BEST DEALS
REASONS TO BUY
Design: The Garmin Venu 2 has a sleek and stylish design that is both functional and fashionable, making it a great accessory for any outfit.
Health and Fitness Features: The Garmin Venu 2 is loaded with advanced health and fitness features, including heart rate monitoring, blood oxygen level tracking, and sleep tracking, making it a great choice for anyone looking to improve their overall health and wellness.
Sports Modes: The device comes with a wide range of sports modes that are tailored to specific activities, making it easy to track your workouts and stay motivated.
Battery Life: The Garmin Venu 2 has a long-lasting battery life that can last up to 11 days on a single charge, making it a reliable and convenient device for everyday use.
Customization: The watch offers a high degree of customization, allowing you to choose from a variety of watch faces and widgets to personalize your device.
REASON TO AVOID
Price: The Garmin Venu 2 is a premium smartwatch that comes with a high price tag, which may be a barrier for some buyers.
Limited App Ecosystem: Although the device can run some third-party apps, the selection may be limited compared to other smartwatch platforms.
Limited Voice Assistant: The Garmin Venu 2 only supports the Garmin voice assistant, which may be a deal-breaker for those who prefer other voice assistants such as Google Assistant or Alexa.
The Garmin Venu 2 is a top-rated smartwatch in 2023 for its comprehensive health tracking features. It includes advanced sensors that can measure skin temperature, oxygen saturation, and even stress levels.
The watch also features built-in GPS, NFC payments, and over 20 workout modes, making it a versatile option for both fitness enthusiasts and everyday users.
Smartwatches have become increasingly popular over the years, with more and more people opting for these wearable devices to help them keep track of their fitness goals, stay connected with their smartphones, and even pay for purchases without having to carry a wallet.
4. Fitbit Sense

TODAY’S BEST DEALS
REASONS TO BUY
Health and Fitness Features: The Fitbit Sense is loaded with advanced health and fitness features, including heart rate monitoring, ECG tracking, skin temperature monitoring, and sleep tracking, making it a great choice for anyone looking to improve their overall health and wellness.
Stress Management: The device comes with built-in stress management tools, including guided breathing sessions and mindfulness exercises, making it a great choice for those who want to improve their mental health and well-being.
Design: The Fitbit Sense has a sleek and modern design that is both functional and fashionable, making it a great accessory for any outfit.
Compatibility: The watch is compatible with both iOS and Android smartphones, making it a great choice for anyone looking for a device that can seamlessly integrate with their existing technology.
REASON TO AVOID
Limited App Ecosystem: Although the device can run some third-party apps, the selection may be limited compared to other smartwatch platforms.
Price: The Fitbit Sense is a premium smartwatch that comes with a high price tag, which may be a barrier for some buyers.
No GPS: The device does not have built-in GPS, which may be a problem for those who need accurate location tracking for outdoor activities.
Limited Voice Assistant: The Fitbit Sense only supports the Amazon Alexa voice assistant, which may be a deal-breaker for those who prefer other voice assistants such as Google Assistant or Siri.
No Music Storage: The device does not have built-in music storage, which may be a problem for those who like to store a large number of songs on their watch.
The Fitbit Sense is another great option for those who prioritize health and wellness. It features advanced sensors that can track skin temperature, heart rate variability, and oxygen saturation. The watch also includes built-in GPS and over 20 exercise modes, making it a great choice for fitness enthusiasts.
If you’re in the market for a high-end smartwatch that can help you live a healthier and more connected lifestyle, the Fitbit Sense is an excellent choice. With its sleek and modern design, advanced health and fitness features, and a variety of smartwatch capabilities, this device is the perfect companion for anyone looking to stay on top of their game.
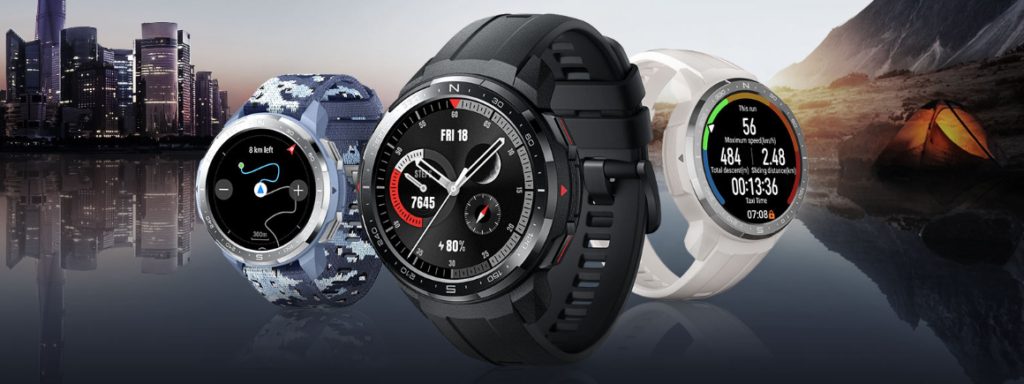
5. Huawei Watch GT 2 Pro

TODAY’S BEST DEALS
REASONS TO BUY
Design: The Huawei Watch GT 2 Pro has a premium and stylish design, featuring a high-quality titanium case and sapphire crystal display, making it a great choice for those who want a fashionable and durable device.
Battery Life: The device has a long battery life that can last up to 14 days on a single charge, making it a convenient and reliable device for everyday use.
Fitness Tracking: The Huawei Watch GT 2 Pro offers a variety of advanced fitness tracking features, including GPS tracking, heart rate monitoring, and a variety of workout modes, making it a great choice for anyone who wants to improve their fitness.
Sleep Tracking: The device also has sleep tracking capabilities, allowing users to monitor their sleep patterns and make adjustments to improve the quality of their sleep.
Compatibility: The watch is compatible with both Android and iOS smartphones, making it a great choice for anyone looking for a device that can seamlessly integrate with their existing technology.
REASON TO AVOID
Limited App Ecosystem: The device does not support third-party apps, limiting its functionality compared to other smartwatch platforms.
No NFC: The Huawei Watch GT 2 Pro does not have NFC capabilities, making it unable to make contactless payments.
No Voice Assistant: The device does not have a built-in voice assistant, which may be a deal-breaker for those who rely heavily on voice commands.
No Cellular Connectivity: The watch does not have cellular connectivity, meaning that it must be connected to a smartphone in order to receive notifications and make calls.
Price: The Huawei Watch GT 2 Pro is a premium smartwatch that comes with a high price tag, which may be a barrier for some buyers.
The Huawei Watch GT 2 Pro is a premium smartwatch that offers advanced features like GPS tracking, voice commands, and mobile payments. It also features a long battery life, making it a great option for those who need a watch that can keep up with their busy lifestyle.
Overall, the Huawei Watch GT 2 Pro is an excellent choice for anyone looking for a premium smartwatch that offers advanced features and a stylish design.
Whether you’re a fitness enthusiast or simply looking for a device that can help you stay connected to your digital life, this smartwatch is a great choice.
6. Fossil Gen 6

TODAY’S BEST DEALS
The Fossil Gen 6 is a stylish smartwatch that offers a range of features, including heart rate monitoring, GPS tracking, and NFC payments. It also boasts a long battery life and a variety of customizable watch faces, making it a great choice for those who want a watch that reflects their personal style.
7. TicWatch Pro 4G/LTE

TODAY’S BEST DEALS
REASON TO BUY
> LTE connectivity allows you to make calls and send messages without the need for a smartphone.
> Large, high-quality display with a resolution of 400 x 400 pixels.
> Dual-display technology that switches between a low-power LCD screen and a high-resolution OLED screen to conserve battery life.
> GPS and heart rate monitoring for fitness tracking.
> Built-in Google Assistant for voice commands and controlling smart home devices.
REASON TO AVOID
> Limited app selection compared to other smartwatches such as Apple Watch and Samsung Galaxy Watch.
> The design may not appeal to everyone, as it has a slightly chunky and industrial look.
> Battery life may be shorter if you use the OLED screen extensively.
> The price is higher than some other smartwatches on the market.
> The watch is not compatible with iOS devices.
The TicWatch Pro 4G/LTE is a top-rated smartwatch that offers cellular connectivity, which means you can make calls and send messages without your phone.
It also features GPS tracking, heart rate monitoring, and NFC payments, making it a versatile option for both fitness enthusiasts and everyday users.
8. Amazfit GTR 2e

TODAY’S BEST DEALS
REASON TO BUY
+ Large, high-quality display with a resolution of 454 x 454 pixels.
+ Long battery life of up to 24 days.
+ Multiple fitness tracking modes, including 90 sports modes, heart rate monitoring, and sleep tracking.
+ Built-in GPS and GLONASS for accurate outdoor activity tracking.
+ Stylish design with a metal body and interchangeable straps.
REASON TO AVOID
# Limited app selection compared to other smartwatches such as – -# Apple Watch and Samsung Galaxy Watch.
# The watch lacks LTE connectivity, so you can’t make calls or send messages without your phone.
# No support for voice commands or virtual assistants.
# Limited customization options for watch faces and notifications.
# No NFC support for mobile payments.
The Amazfit GTR 2e is a budget-friendly smartwatch that offers advanced features like GPS tracking, heart rate monitoring, and mobile payments. It also boasts a long battery life, making it a great option for those who need a watch that can keep up with their busy lifestyle.
9. Mobvoi TicWatch E3

TODAY’S BEST DEALS
REASON TO BUY
+ Affordable price point compared to other smartwatches on the market.
+ Large, high-quality display with a resolution of 360 x 360 pixels.
+ Multiple fitness tracking modes, including heart rate monitoring, sleep tracking, and built-in GPS.
+ Google Assistant built-in for voice commands and controlling smart home devices.
+ Supports NFC payments with Google Pay.
REASON TO AVOID
-Limited app selection compared to other smartwatches such as Apple Watch and Samsung Galaxy Watch.
-The design may not appeal to everyone, as it has a slightly chunky and utilitarian look.
-Battery life may not be as long as some other smartwatches on the market.
-The watch lacks LTE connectivity, so you can’t make calls or send messages without your phone.
-Limited customization options for watch faces and notifications.
The Mobvoi TicWatch E3 is a mid-range smartwatch that offers advanced features like heart rate monitoring, GPS tracking, and NFC payments.
It also features a long battery life and a range of customizable watch faces, making it a great option for those who want a watch that reflects their personal style.
10. Honor Watch GS Pro
TODAY’S BEST DEALS
REASON TO BUY
+ Long battery life of up to 25 days in normal mode and up to 48 hours in GPS mode.
+ Built-in GPS and GLONASS for accurate outdoor activity tracking.
+ Multiple fitness tracking modes, including 100 workout modes, heart rate monitoring, and sleep tracking.
+ Durable and rugged design that is water-resistant up to 50 meters and meets military-grade durability standards.
+ Large, high-quality display with a resolution of 454 x 454 pixels.
REASON TO AVOID
-Limited app selection compared to other smartwatches such as Apple Watch and Samsung Galaxy Watch.
-The watch lacks LTE connectivity, so you can’t make calls or send messages without your phone.
-Limited customization options for watch faces and notifications.
-No support for voice commands or virtual assistants.
-The design may not appeal to everyone, as it has a bulky and rugged look.
The Honor Watch GS Pro is a rugged smartwatch designed for outdoor enthusiasts and athletes. It has a durable, MIL-STD-810G certified body that can withstand extreme temperatures, shocks, and drops, making it one of the best smartwatches for outdoor activities. It also has a water-resistant rating of up to 50 meters, so you can wear it while swimming or doing water sports.
Overall, the Honor Watch GS Pro is one of the best smartwatches for outdoor enthusiasts and athletes who need a durable, long-lasting watch that can track their fitness and outdoor activities accurately.
Its rugged design, long battery life, and multiple fitness tracking modes make it a great choice for anyone who loves the great outdoors.
Buying Guide for Best Smartwatches
If you’re in the market for the best smartwatch of 2023, there are several factors to consider before making your purchase. Here are some key considerations to keep in mind:
Health and Fitness Features: One of the most important factors to consider when choosing a smartwatch is the health and fitness features it offers. Look for watches that offer heart rate monitoring, blood pressure monitoring, ECG, and other health tracking features that can help you stay on top of your fitness goals.
Connectivity: Another important factor to consider is connectivity. Look for watches that offer cellular connectivity, allowing you to make calls and send messages without your phone. Also, consider the range of connectivity options available, such as Wi-Fi, Bluetooth, and NFC.
Design and Display: The design and display of a smartwatch are also important factors to consider. Look for watches that offer a sleek and stylish design, as well as a display that is easy to navigate and read.
Battery Life: A long battery life is important for those who need a watch that can keep up with their busy lifestyle. Look for watches that offer a battery life of at least 24 hours or more.
Compatibility: Make sure to choose a smartwatch that is compatible with your smartphone and any other devices you plan to use it with. Check for compatibility with both Android and iOS operating systems.
By considering these factors, you can find the best smartwatch of 2023 that meets your needs and fits your lifestyle. Whether you’re looking for a watch that can help you track your fitness goals or keep you connected on the go, there’s a smartwatch out there that’s perfect for you.
Frequently Asked Questions
Q: What is the best smartwatch of 2023?
A: The best smartwatch of 2023 can vary depending on individual needs and preferences. However, the Apple Watch Series 7 and Samsung Galaxy Watch 4 are widely considered to be top contenders in the market.
Q: What health and fitness features should I look for in a smartwatch?
A: When choosing a smartwatch, it’s important to consider health and fitness features such as heart rate monitoring, blood pressure monitoring, ECG, and fitness tracking modes. Some watches may also offer sleep tracking and blood oxygen monitoring.
Q: Can I make calls and send messages from a smartwatch?
A: Yes, many smartwatches offer cellular connectivity, allowing you to make calls and send messages without your phone. However, it’s important to note that this feature may require an additional monthly service plan.
Q: What is the battery life of a typical smartwatch?
A: The battery life of a smartwatch can vary depending on the model and usage. However, most smartwatches offer a battery life of at least 24 hours or more.
Q: What operating systems are compatible with smartwatches?
A: Most smartwatches are compatible with both Android and iOS operating systems. However, it’s important to check for compatibility with your specific smartphone or device before making a purchase.
Q: How do I choose the best smartwatch for me?
A: To choose the best smartwatch for your needs, consider factors such as health and fitness features, connectivity options, design and display, battery life, and compatibility with your devices. By evaluating these factors, you can find a smartwatch that meets your needs and fits your lifestyle.
Summary
To sum up, the top smartwatch of 2023 combines features for fitness and health, connectivity, display and design, battery life, and device compatibility.
With the Samsung Galaxy Watch 4 and Apple Watch Series 7 leading the market, customers have a variety of options to select from when looking for the ideal wristwatch to suit their unique requirements and tastes.
You may choose the ideal wristwatch for your needs and lifestyle, one that keeps you connected and on top of your fitness objectives, by considering the points this article mentions.
Want to learn how to create a website using WordPress click here